How Do I Pay My Animal Registration?
Additional Information
| Before you start: This feature may not be available from your council. Check its website for animal registration information. You can pay with an autopay plan or a one-off payment, and both are covered below. Only credit or debit cards are accepted for animal registration renewals. Bank account payments aren't supported for this notice type. An autopay plan renews automatically each registration year until you cancel it. |
Renew your animal's registration online in a few minutes. Set up autopay so it's taken care of every year, or pay the full amount now.
Go to your council's animal registration payment link, or scan the QR code on your registration or reminder notice.
Sign in with your mobile number or email address (if supported).
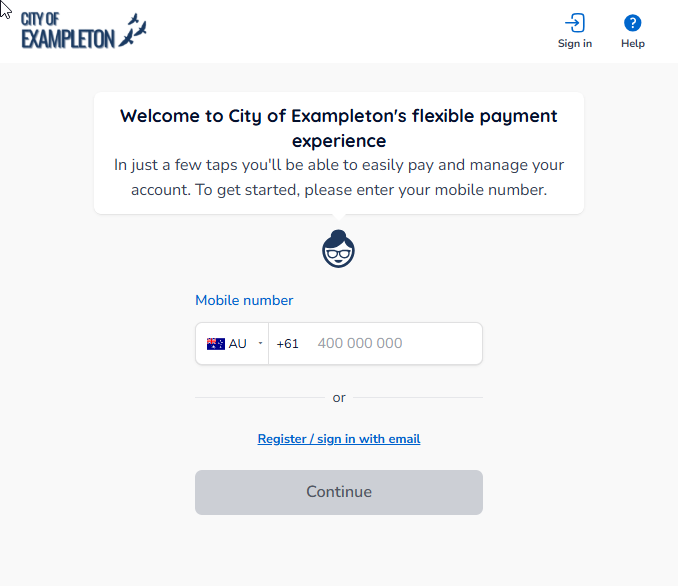
Enter your mobile number or email address, then enter the 6-digit verification code we send you.
| Note: If you came from your council's website rather than scanning a QR code, you'll need your animal reference number to search for your registration. |
The account confirmation screen shows your animal's registration details. Check they're correct. If anything is wrong, click Update pet details before you continue.
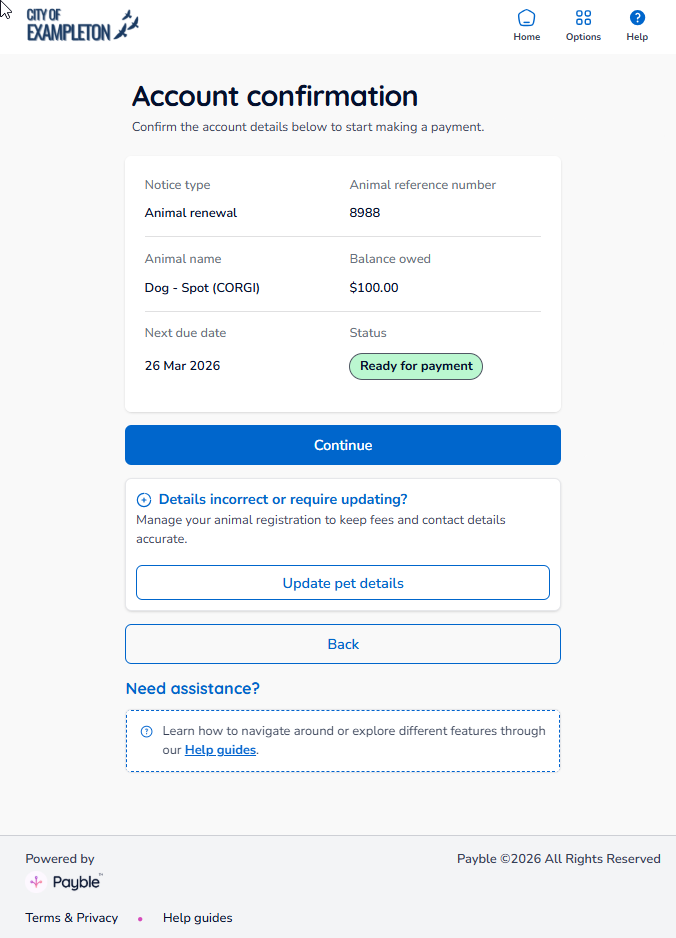
Click Continue to go to the payment options.
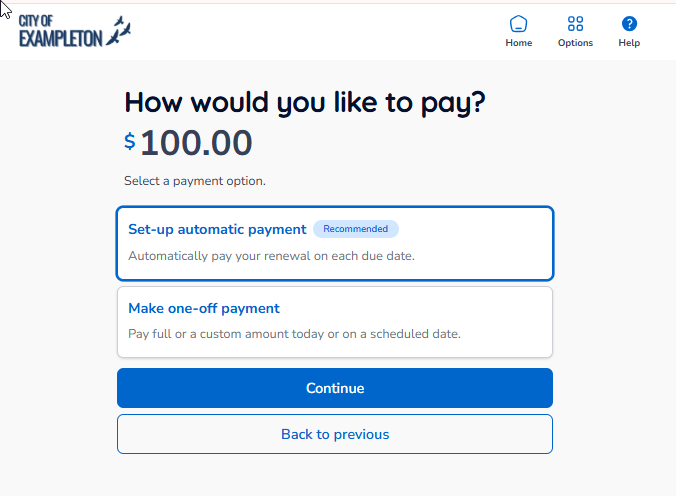
Once you've reviewed your details in Phase 1, choose one of the options below. You only need to complete one.
Option A — Set Up Automatic Payment (Recommended)
| Note: Once set up, your autopay plan continues automatically each registration year unless you cancel it. The amount may change from year to year in line with registration fees. You can cancel or update your plan at any time before a payment is processed. |
On the payment options screen, select Set-up automatic payment, then click Continue.
Read the autopay terms, which explain what to expect from the plan. When you're happy, click Continue.
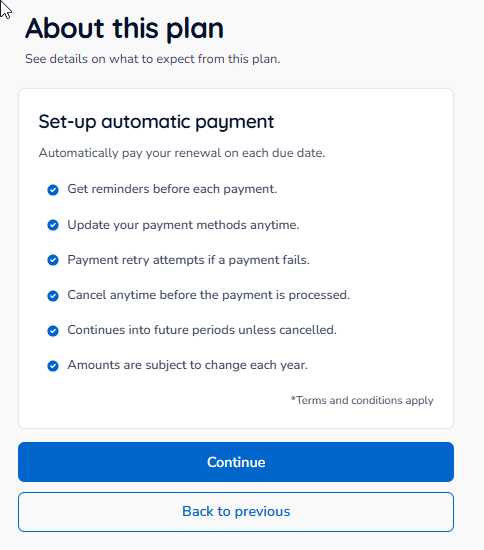
Check the date and amount of your next scheduled payment.
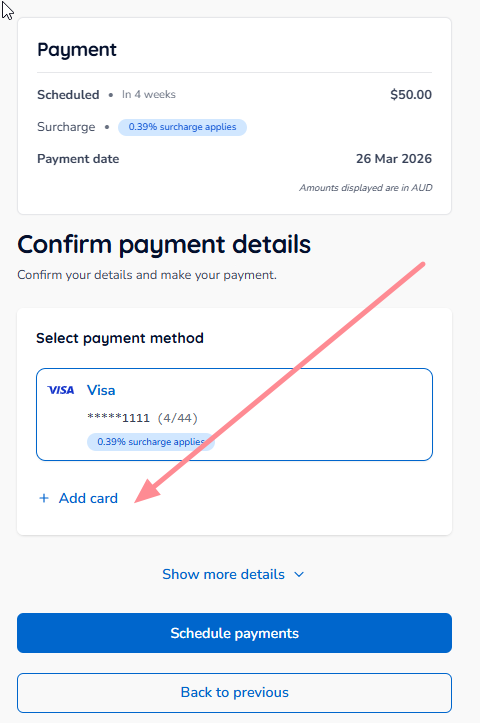
Select a card you've used with Payble before, or click Add card to add a new one.
- If you're adding a new card, fill in the form that opens.
- You'll need to agree to the Payble terms and conditions, privacy policy and any surcharge your council applies.
- You can't add a new card unless you agree to all the terms shown.
Select your card, then click Schedule payments.
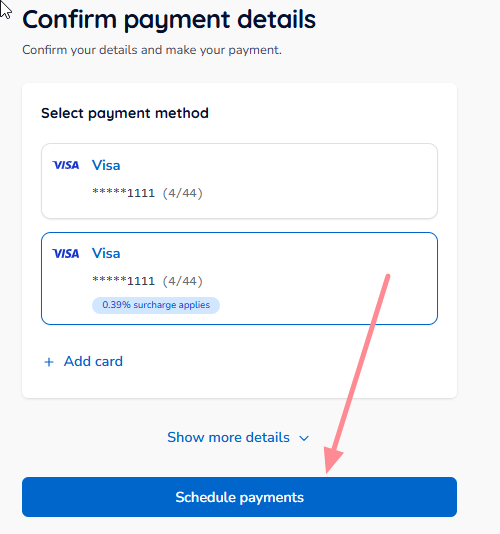
Your payments are now scheduled and will be taken on the dates shown earlier. You'll see a summary of your new plan.
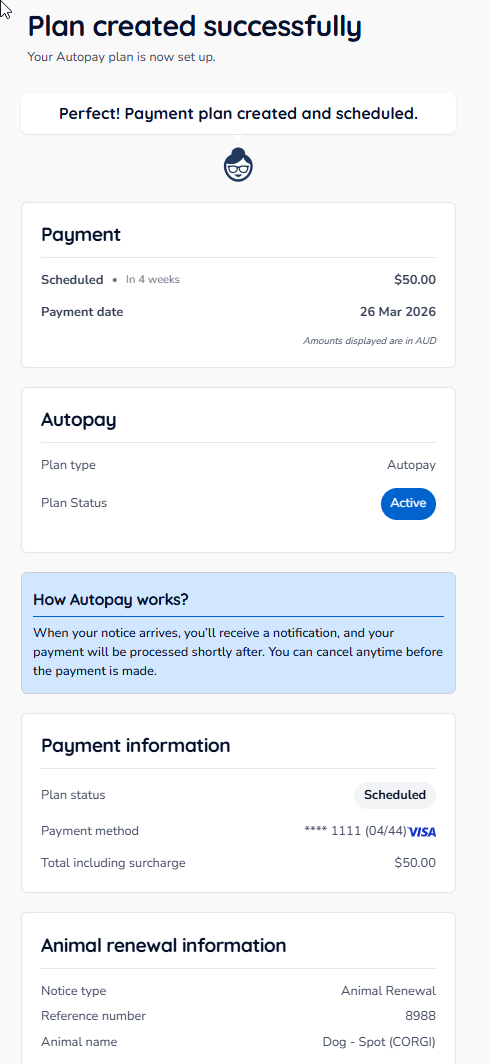
Your autopay plan is now active. You'll get a reminder before each annual payment is taken.
Option B — Make a One-Off Payment
| Note: A one-off payment is taken immediately, not on the due date. If you'd rather pay on the due date, set up an autopay plan instead (Option A). You don't need to do this if you've already set up autopay. |
On the payment options screen, select Make one-off payment, then click Continue.
Check the total amount owing on the payment confirmation screen, then click Continue.
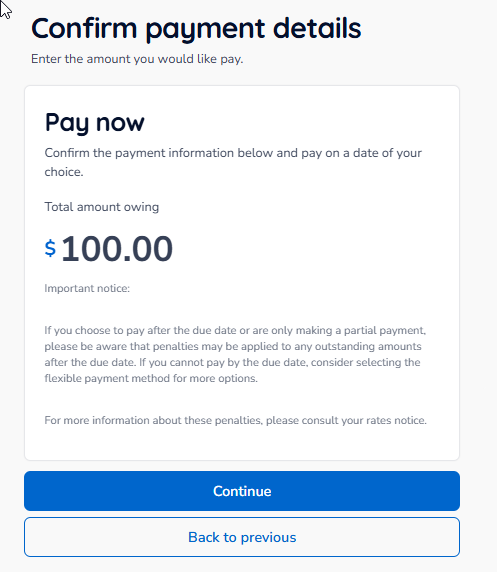
Select a card you've used with Payble before, or click Add card to add a new one.
- If you're adding a new card, fill in the form that opens.
- You'll need to agree to the Payble terms and conditions, privacy policy and any surcharge your council applies.
- You can't add a new card unless you agree to all the terms shown.
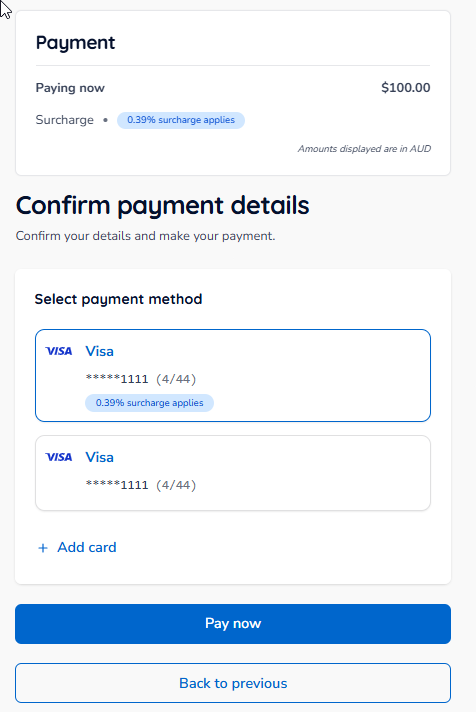
Select your card, then click Pay now.
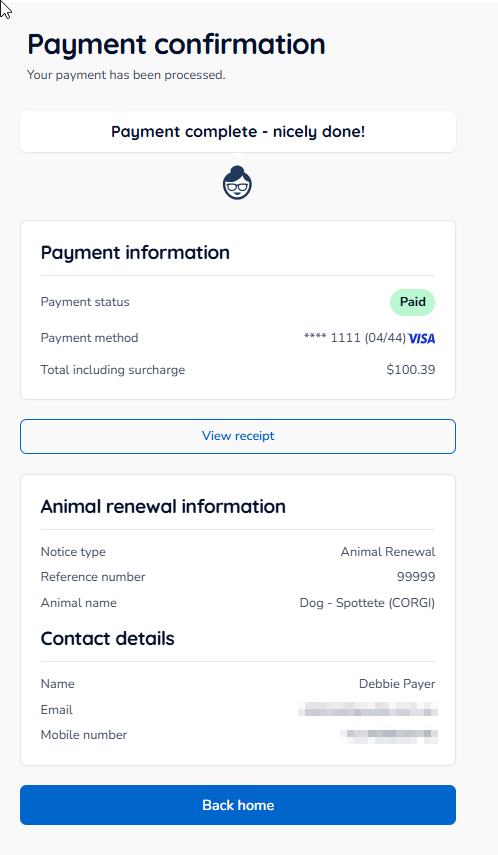
Once your payment is processed, a payment confirmation screen will confirm it was successful and show a summary of your animal registration.
Frequently Asked Questions
| Question | Answer |
|---|---|
| What payment methods are accepted? | Only credit and debit cards. Bank account payments aren't available for animal registration renewals. |
| Will I be charged a surcharge? | Your council may charge a surcharge. You'll see it when you choose a payment method. |
| Does autopay renew automatically each year? | Yes. Your autopay plan continues each registration year until you cancel it, and you'll get a reminder before each payment is taken. |
| Can I cancel my autopay plan? | Yes, at any time before the scheduled payment is processed. Sign in and go to your active plans to manage or cancel it. |
| What if my animal's details are incorrect? | Click Update pet details on the account confirmation screen before you pay. |
| Who do I contact for help? | Contact your local council directly. |